> For the complete documentation index, see [llms.txt](https://help.aranet.com/llms.txt). Markdown versions of documentation pages are available by appending `.md` to page URLs; this page is available as [Markdown](https://help.aranet.com/aranet-cloud-page/aranet-cloud-landing-page/integrations-and-extensions/setting-up-30mhz-integration.md).
# Setting up 30MHz Integration
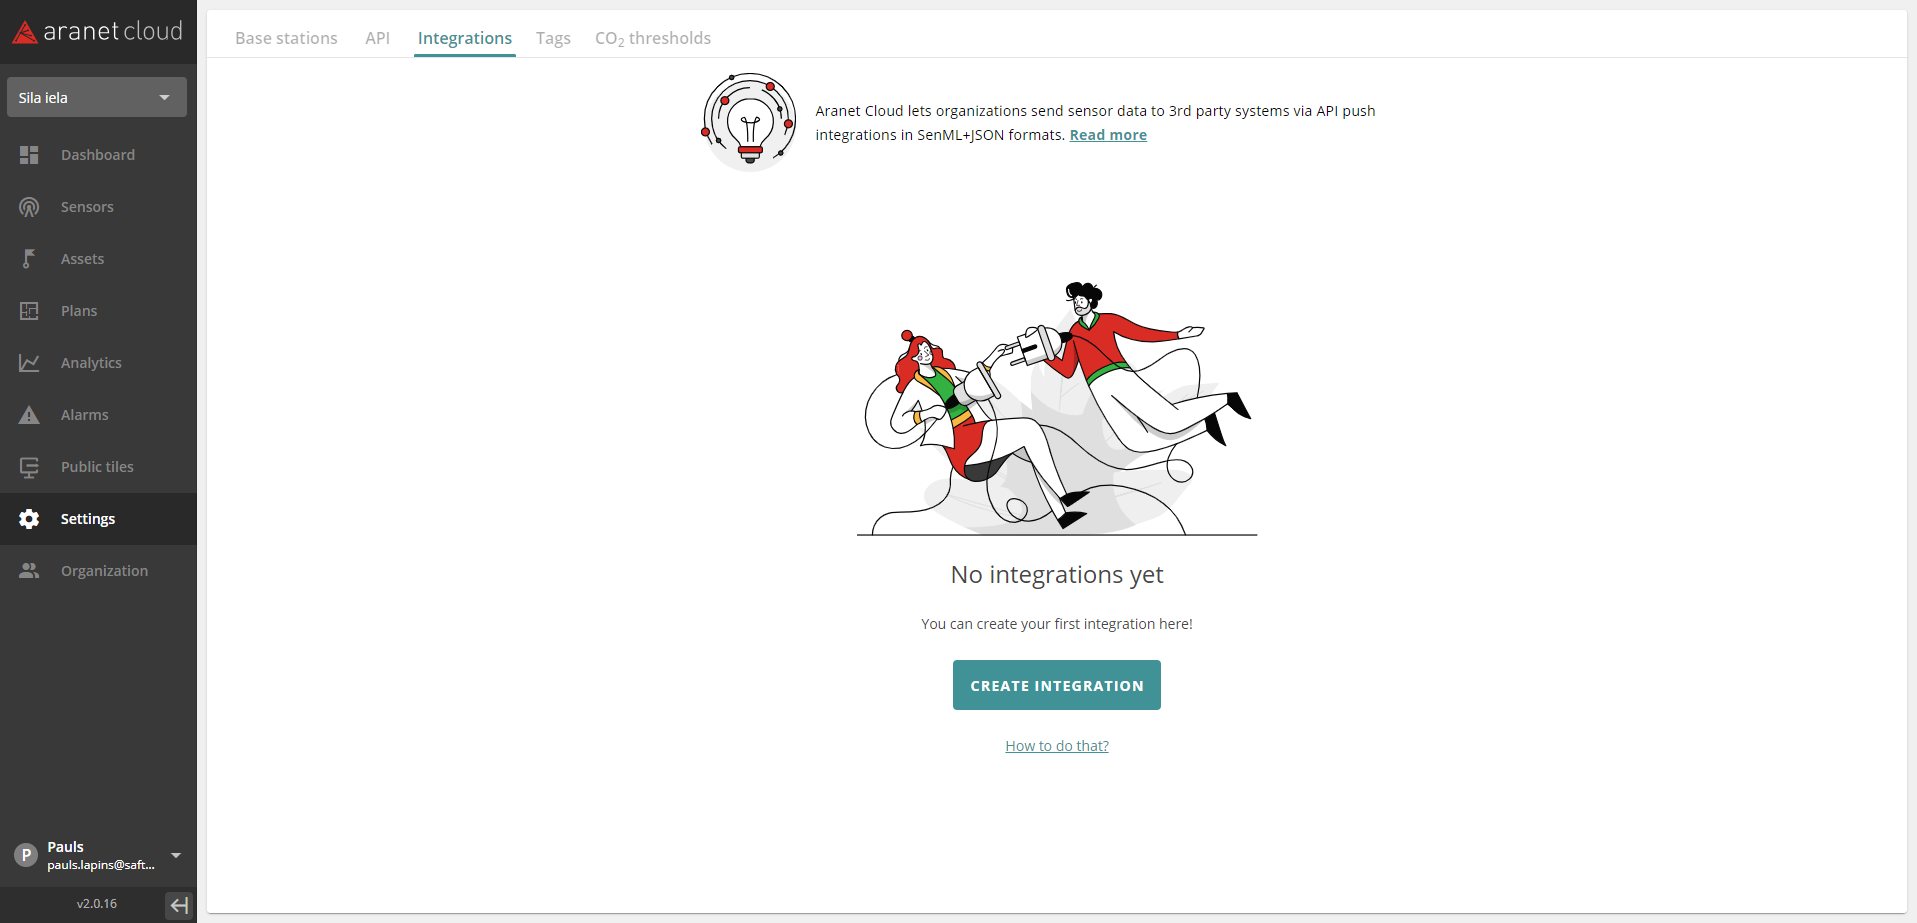
To set up a 30MHz integration, you need to go to "settings", click on "Integrations", and click on the "CREATE INTEGRATION" button on the page.
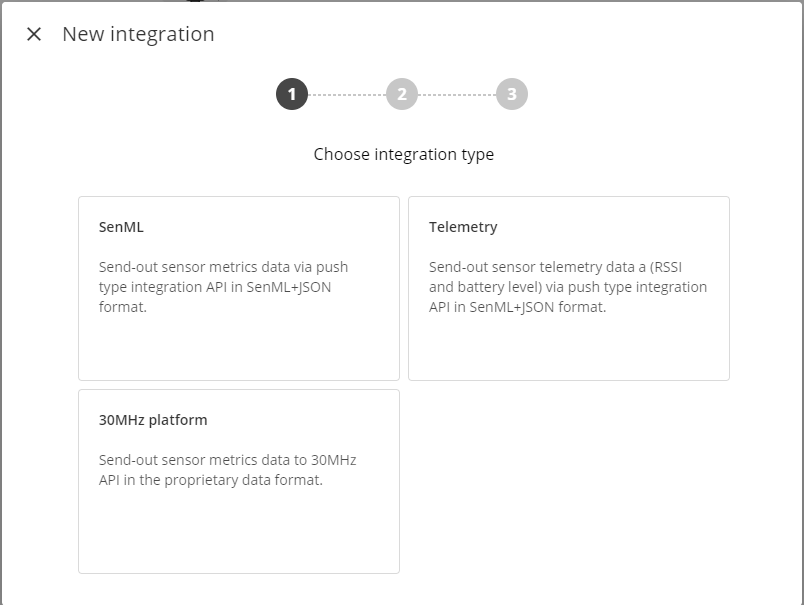
Clicking on “**CREATE INTEGRATION**” opens a new pop-up window where the desired integration can be made:
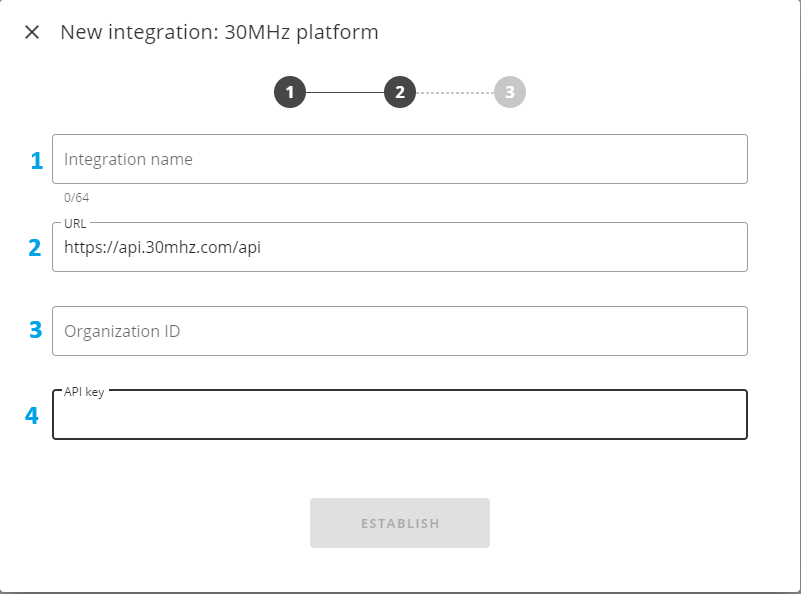
Click on the 30MHz platform window, and a setup window presents itself:
1. **Integration name -** allows assigning a visible name for the new integration;
2. **URL** – allows specifying the web address for the endpoint of the 30MHz integration
3. **Organization ID -** 30 MHz Organization ID
4. **API key** – allows specifying a unique identifier (key) for the authentication of the data exchange between Aranet Cloud and the external 3rd-party system. The API key must be provided by the external 3rd-party system (30 MHz). If no authentication is required from the external 3rd-party system, then this field can be left blank.
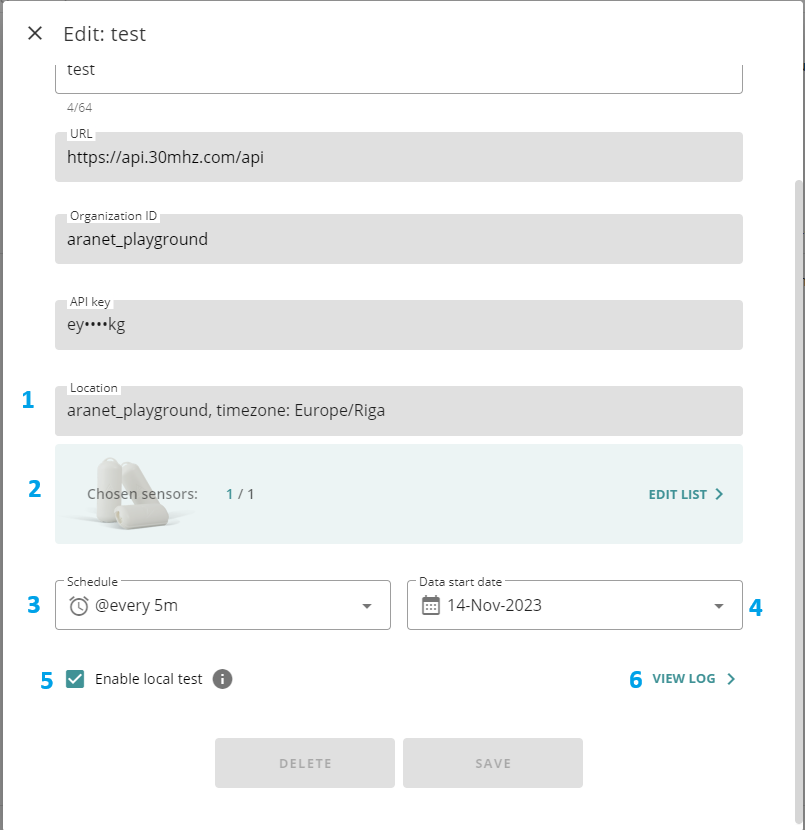
Afterward, more fields appear if a successful connection is made:
1. **Location -** choose the location of your organization a drop-down field with available time zones will appear if the information is available to the server.
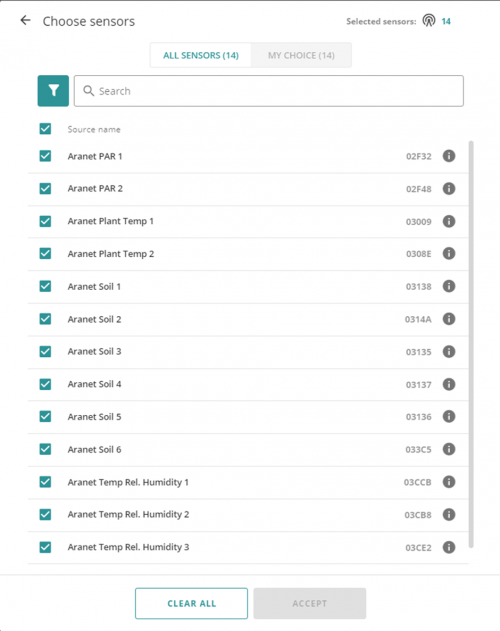
2. **Sensors** – opens a new pop-up window where you can specify sensors from the Cloud workspace which metric data will be sent out from Aranet Cloud. Sensors here can be filtered and then selected by their paired Bases, Sensor types, and tags (if used):
3. **Schedule** – allows specifying how often Aranet Cloud will send data files to the external 3rd party system**.** When integration is enabled and running, each new data transmission from Aranet Cloud will include sensor metric data that has been gathered on the Cloud workspace after the previous data send-out. The exception here is the initial historic data send-out that can happen over multiple consecutive data transmissions until the latest data has been dispatched.\
Here user can also enter a valid CRON query specifying a custom data send-out schedule (examples of possible CRON schedule expression configurations are available: ).
4. **Data start date** – allows specifying the date from which historic sensor metric data will be sent from Aranet Cloud to the external 3rd party system. Aranet Cloud will use this date to identify how old historical data shall be included in the first send-out.
5. **Enable local test** – allows enabling of the test mode for the integration. If this box is checked, then the Aranet Cloud platform will not send data out to the external 3rd party system, but integration data files will be prepared and saved locally on the Aranet Cloud workspace. Such files, the user can later open and check from the corresponding Aranet Cloud integration configuration.
6. **View Log -** Opens the log window, more information in the post below
You can choose one or multiple sensors by selecting them in the sensor list:
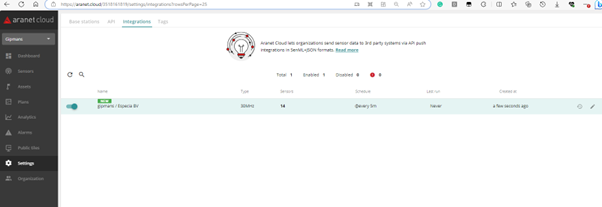
After clicking on the "ESTABLISH" button, you will see this screen, and the integration should be visible in the "Integrations" screen like this:
---
# Agent Instructions
This documentation is published with GitBook. GitBook is the documentation platform designed so that both humans and AI agents can read, navigate, and reason over technical content effectively. Learn more at gitbook.com.
## Querying This Documentation
If you need additional information that is not directly available in this page, you can query the documentation dynamically by asking a question.
Perform an HTTP GET request on the current page URL with the `ask` query parameter, and the optional `goal` query parameter:
```
GET https://help.aranet.com/aranet-cloud-page/aranet-cloud-landing-page/integrations-and-extensions/setting-up-30mhz-integration.md?ask=&goal=
```
`ask` is the immediate question: it should be specific, self-contained, and written in natural language.
`goal` is optional and describes the broader end goal you are ultimately trying to accomplish on behalf of the user. GitBook uses it to tailor the answer towards what is most useful for that goal.
The response will contain a direct answer to the question and relevant excerpts and sources from the documentation.
Use this mechanism when the answer is not explicitly present in the current page, you need clarification or additional context, or you want to retrieve related documentation sections.